Part 4: phpIPAM v1.4+ – SAML2 Authentication with vRealize Identity Manager 3.3.2+
I have recently been on a LONG journey around integrating phpIPAM into a corporate environment. This includes building (coding from a blank SDK) an integration between vRealize Automation and phpIPAM, as well configuring SAML2 Authentication and Single Sign-On.
This is part 4 of a multi-part series, documenting how I deployed and integrated phpIPAM into an environment utilizing the vRealize Suite and other integrations to make full use of the product.
Here is the full list of links to all the parts of my phpIPAM Journey:
- Part 1: phpIPAM v1.4+ – Deployment on CentOS 8
- Part 2: phpIPAM v1.4+ – Configuring Active Directory Authentication
- Part 3: phpIPAM v1.4+ – Deploying Scan Agents for Remote Locations
- Part 4: phpIPAM v1.4+ – SAML2 Authentication with vRealize Identity Manager 3.3.2
Pre-Requirements:
Active Directory Authentication:
This article builds on the previous portions of this series, so if you haven’t done it yet, see Part 2 of this series for setting up Active Directory Authentication inside phpIPAM.
Create User Accounts:
At this time, you have to manually create the accounts in phpIPAM to match up to the Authentication Request. It is kind of a pain, but for now, that is how it is. Hopefully in a future release, this won’t be the case.
Working vRealize Identity Manager:
I am not going to detail how to get any vRealize Suites setup, as there are plenty of articles and documents on the inter-webs. If you don’t have this, or don’t know how to set it up, just ask “The Great Google Machine” and it will tell you how to do this. Otherwise, the rest of this article assumes you already have a working vRealize Identity Manager setup.
Configuring the phpIPAM SAML2 Identity Provider:
The first thing you will need to do, is grab some information from vIDM.
Navigate to the Catalog tab and click the Settings button.
In the Settings Box, click SAML Metadata entry.
You should see something like this:

Click on the “Copy URL” link next to “Identity Provider (IdP) metadata”. You will need this for setting up the SAML2 Provider in phpIPAM. You will also need to copy the content for the Signing Certificate. You can scroll down and click the “Copy” link to copy it to your clipboard.
Next, log into you phpIPAM interface as an Administrator user account. I would recommend that you don’t log in with the account you are using for test purposes.
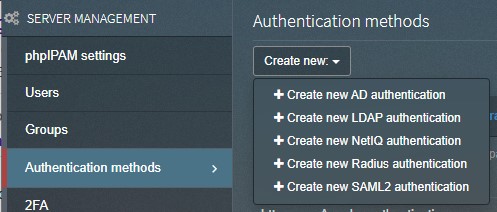
Navigate to Administration -> Authentication methods. Click the Create new: button, and select +Create new SAML2 authentication:
In the SAML2 connection settings box, you will need to fill out the information for your vIDM Installation:
Description: Can be anything you want it to be.
Client ID: This can be anything, but it is recommended to make it the base URL for your phpIPAM installation.
IDP issuer: Paste in the URL that copied previously. It should look similar to https://<your_vIDM_FQDN>/SAAS/API/1.0/GET/metadata/idp.xml
IDP login url: https://<your_vIDM_FQDN>/SAAS/auth/federation/sso
IDP logout url: https://<your_vIDM_FQDN>/SAAS/auth/logout
IDP X.509 public cert: Paste in the Signing Certificate you copied earlier.
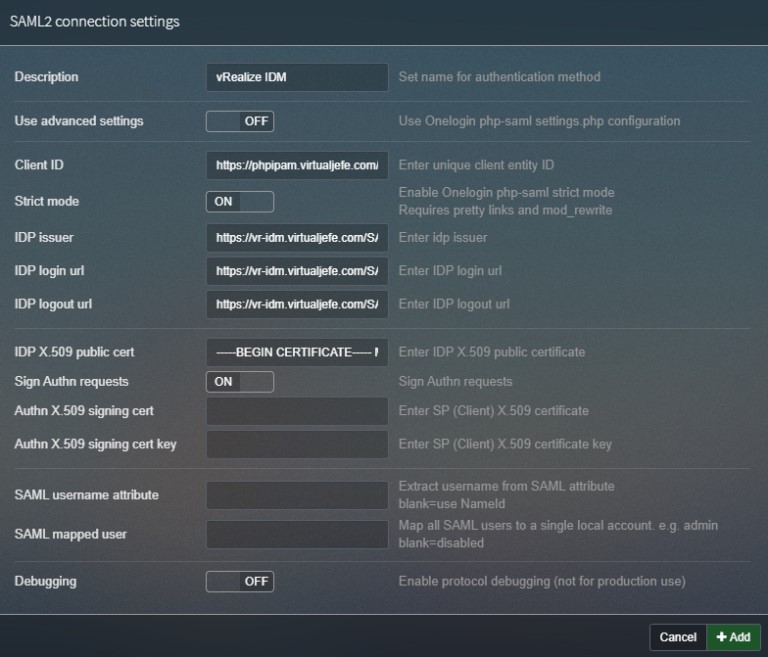
Now you can click the “+Add” button, and you should have a new SAML2 Authentication method listed.
Next to your newly created SAML2 entry, you will see a set of icons:

Click on the info (i) button, and it will open a new window with XML data. You will need to make sure that you copy this data, IN ITS ENTIRETY. This may mean that you will need to open the page source to see all the XML headers. I find it easier to copy the entire XML code from the page source, so that is what I will recommend that you do.
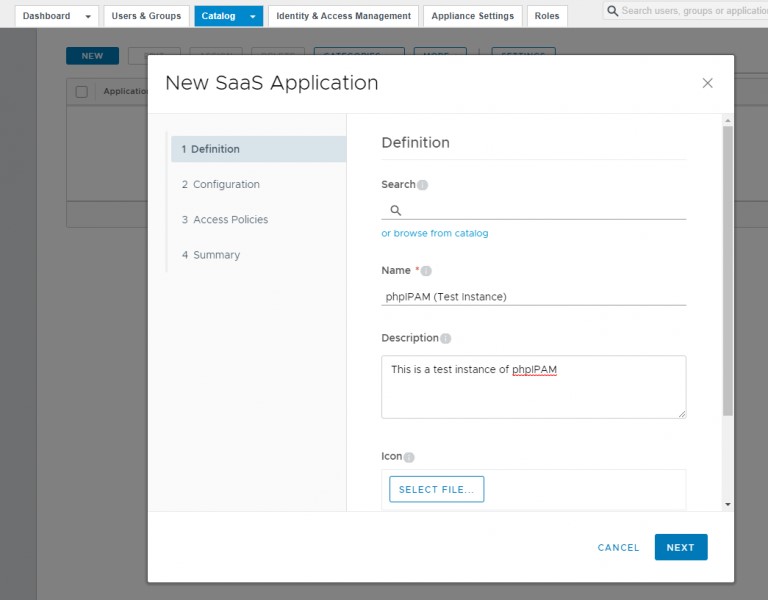
Back in vRealize Identity Manager, you will need to click on the NEW button, to start creating a new SaaS Application.
Fill in the Definition Information and click NEXT:
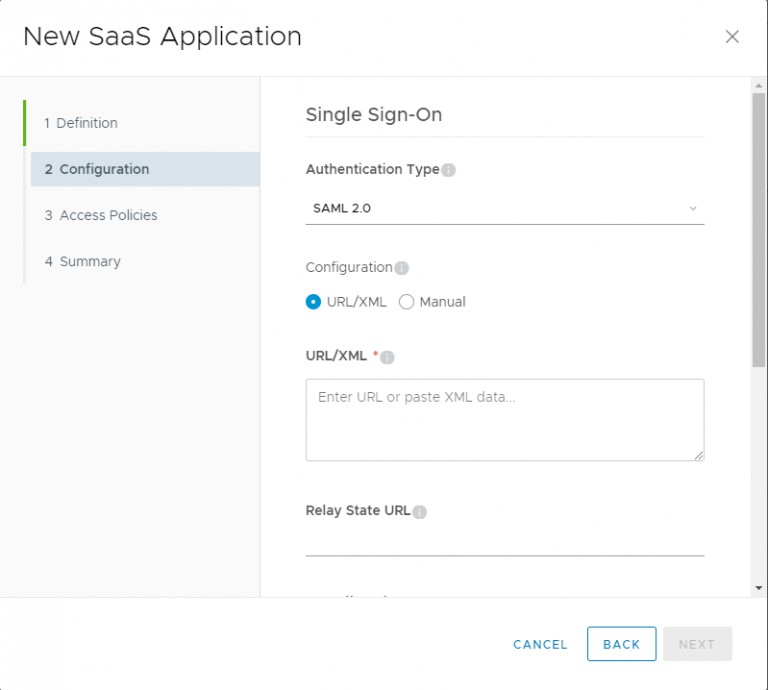
On the next page, make sure you have SAML 2.0 selected as the Authentication Type.
You will need to past in the XML code that you copied, previously, into the Configuration box. Make sure that “URL/XML” is selected.
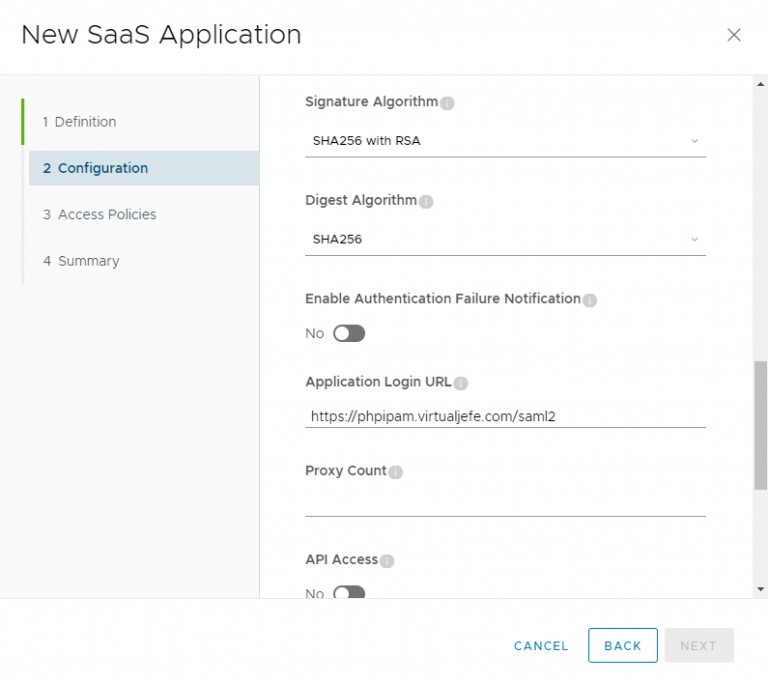
Scroll down, and expand Advanced Properties.
Change both Signature Algorithm and Digest Algorithm to SHA256.
For the Application Login URL, enter the SAML2 URL for you phpIPAM Instance:
https://<your_phpIPAM_FQDN>/saml2
Set your Access Policies however you like, based on your organization’s needs.
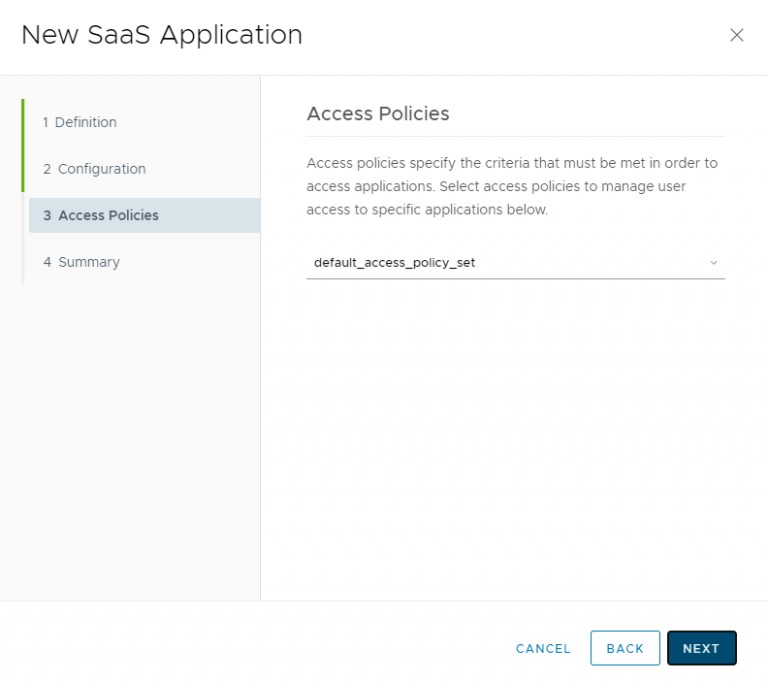
Click NEXT.
Click SAVE.
You will need to assign the new Web App to users, so they can access the app through SAML Login. Once that is done, you should have a working SAML2 Authentication between phpIPAM and vRealize Identity Manager 3.3.2.
Leave a Reply
You must be logged in to post a comment.